Realistic human 3D model: the eye
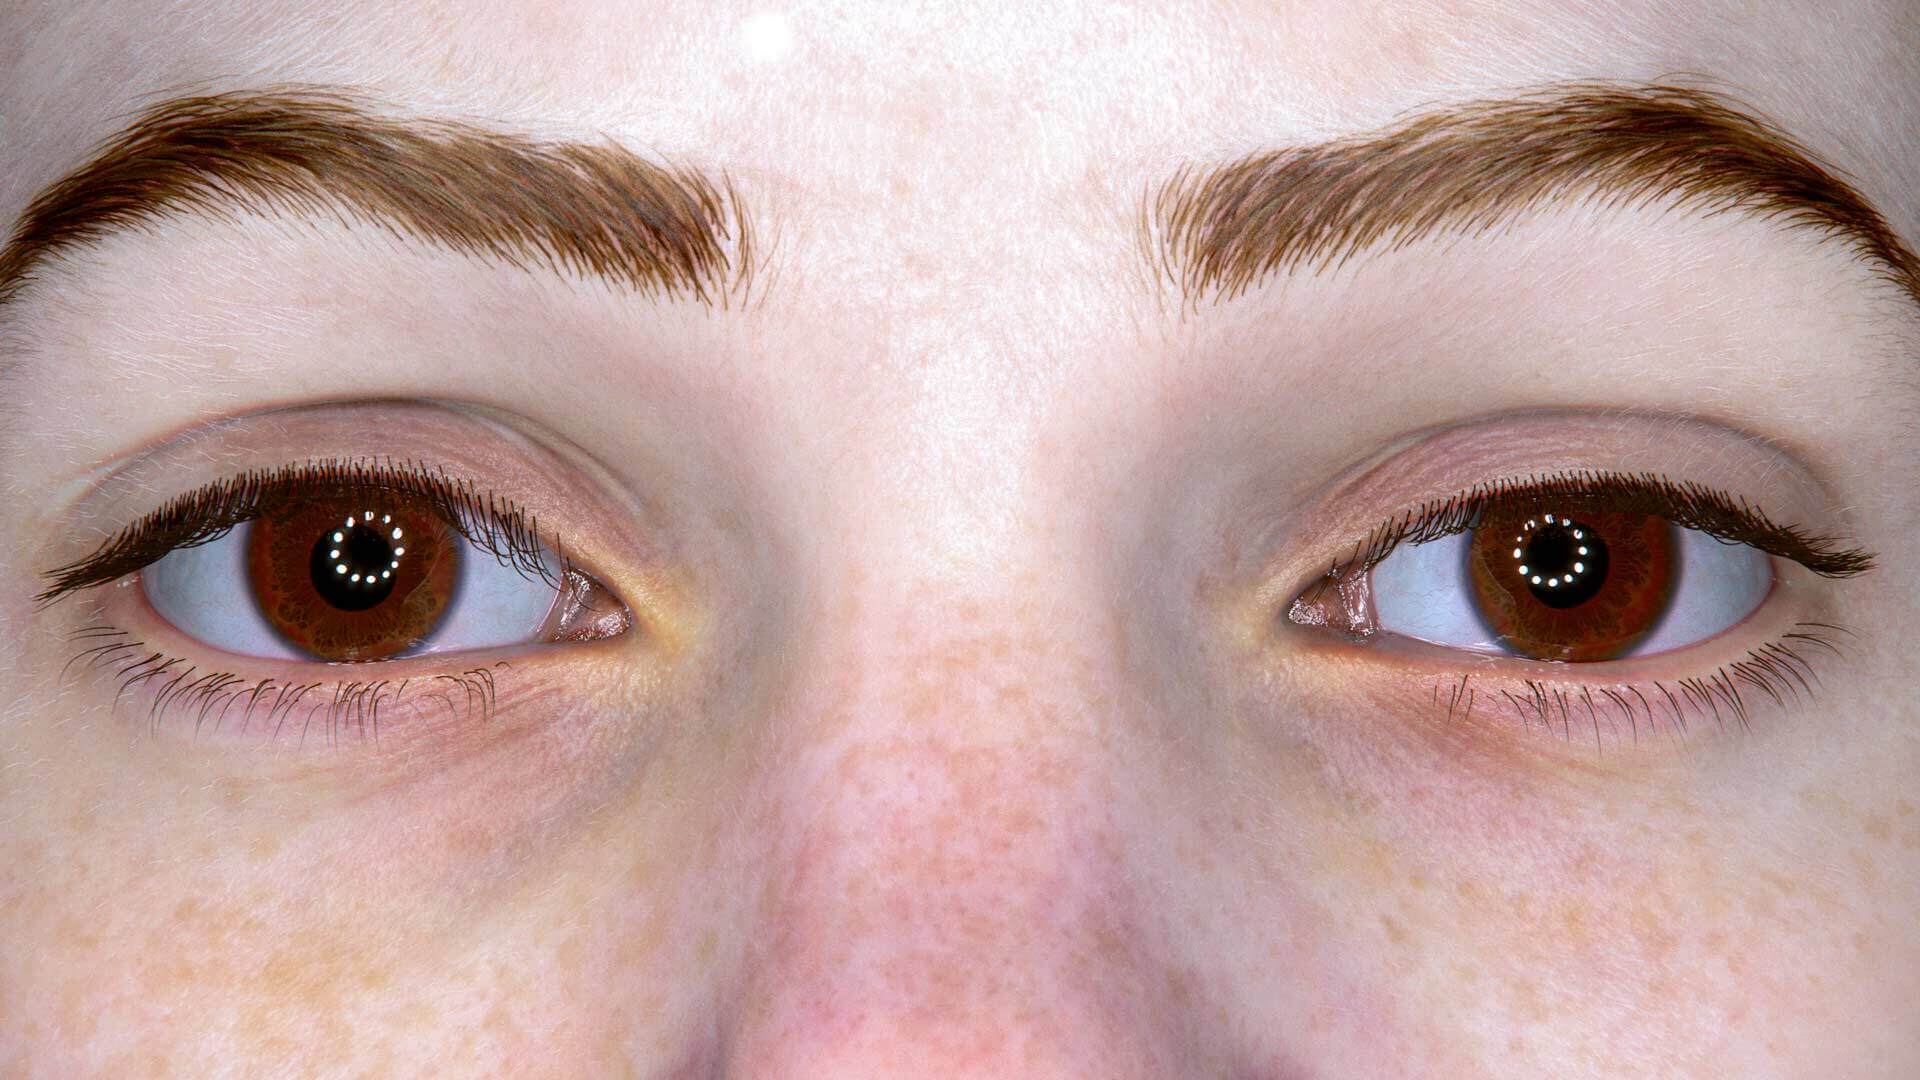
Creating a realistic human 3D model is very challenging – as you work towards realism, it’s easy to step into the uncanny valley, the phenomenon when something is slightly off with the model.
To avoid that, our senior 3D artist Jēkabs Jaunarājs guides us through creating one.
Working on Alina, my realistic human 3D model, I made a lot of discoveries – enough for a blog series with three articles, each focusing on a different subject. This article shares my findings from creating the eye 3D model. The following articles will focus on my solutions for the skin, different types of hair, and teeth.
Eye 3D model
For this project, I made the eye 3D model from scratch. It’s a lot of work but I also learned a lot. The good news is that one good eye 3D model in your library is all you need. Just copy-paste the model, rotate it by a random degree, and re-use it for each new project.
I start the blog series with an article on eyes because they’re the most looked at element of the face and also the most complex to recreate. We’ll solve this complexity step by step.
Sclera is lightly tinted
One of the things that I learned while creating this model is that the outer layer of the eye – the sclera – is not clear, as I previously thought. I discovered this by going through numerous iterations of material settings and making lots of test renderings of the eye 3D model.
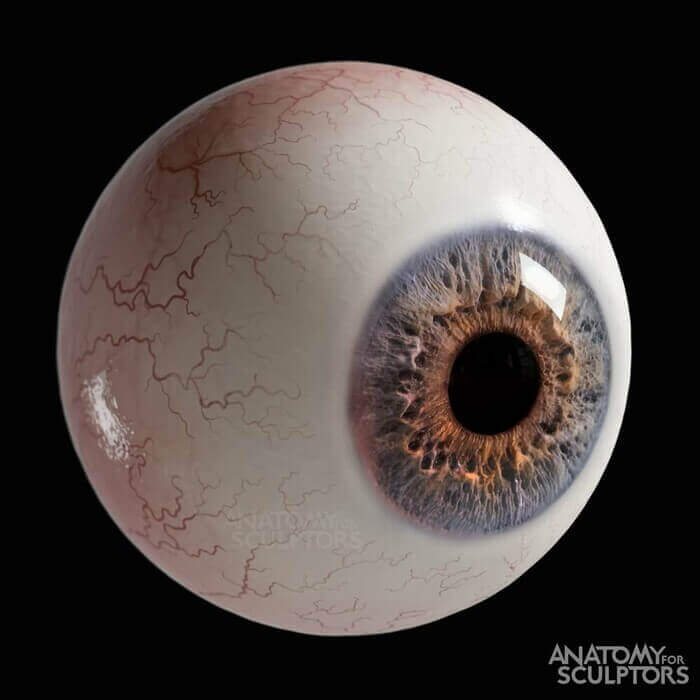
An eye 3D model.
The clear layer just kept looking very wrong and unrealistic. Finally, I tried tinting the sclera a bit, and the face became much more realistic. Making accurate observations is never easy, but it improves your 3D models.
Iris of the eye
Macro photos of the iris of the eye reveal its delicate and complex form. Someplace the iris of the eye looks sponge-like, at a different place it branches out with multiple thin fibers going in many different directions.
The borderline of the iris of the eye varies in density, is a bit chaotic, and may have multiple layers. In computer-generated imagery, that’s a problem because we work with exact polygons.
To tackle this problem, you have to do some lying. Traditional painting uses perspective to create 2D drawings that give an illusion of three dimensions. In computer-generated imagery, we can pull some similar tricks to imitate the complexity of the iris.
“I constructed a complex, realistic-looking iris from two simple layers – an upper ring and a disk below it.”
The upper ring is at the surface level of the eyeball. It features fibers that are more translucent near the center of the ring and become gradually more opaque as they approach the ring’s outer edge.
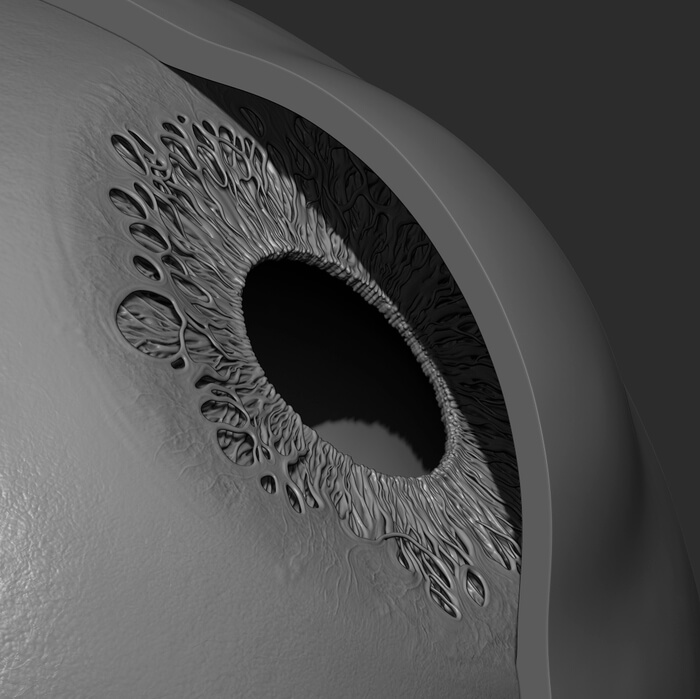
Iris geometry sculpt.
Below this ring, is a completely opaque disk with its unique form and texture. The combination of the disk as a background and the semi-translucent fibers in the foreground create an illusion of complexity and depth similar to an actual iris of the eye.
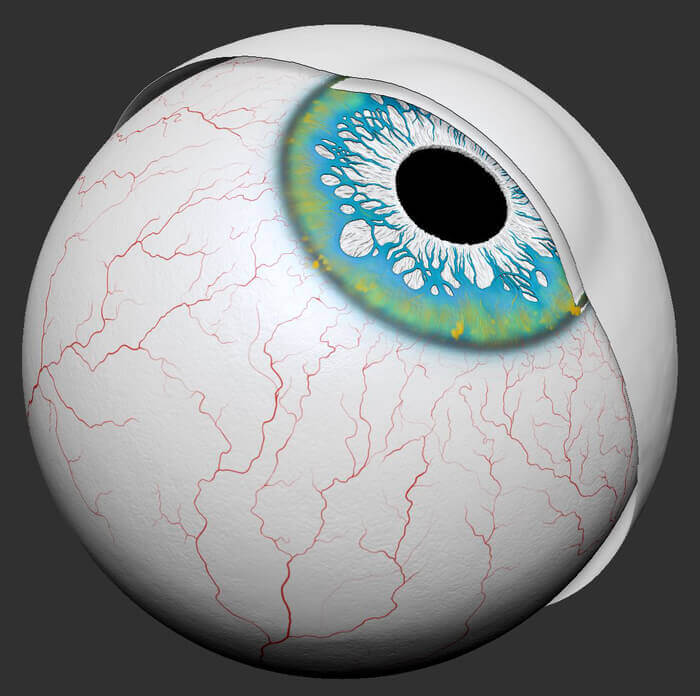
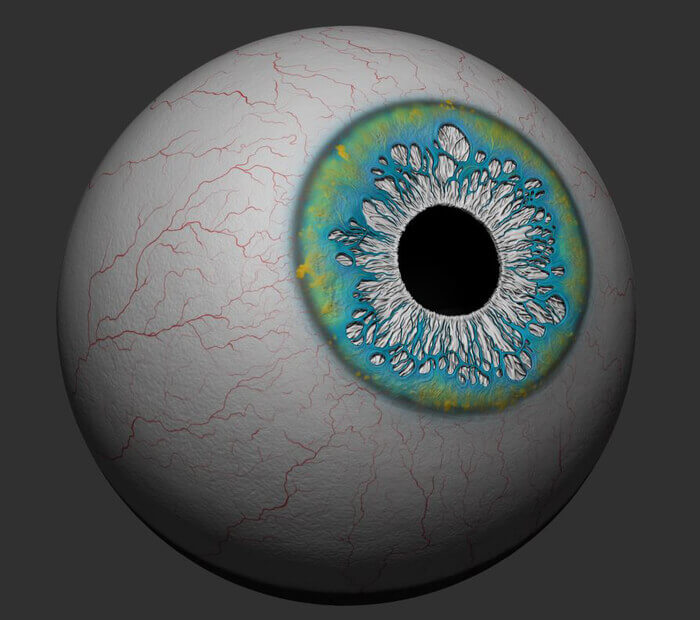
A sculpt with a polypaint sketch.
Connect the eyelid to the eyeball
An essential thing to do for an eye to look realistic is to add tears, even if your character is not crying. Although it’s not a part of the tissue that comprises the human body, we always have some wetness at the spot where the eyeball meets the eyelid.
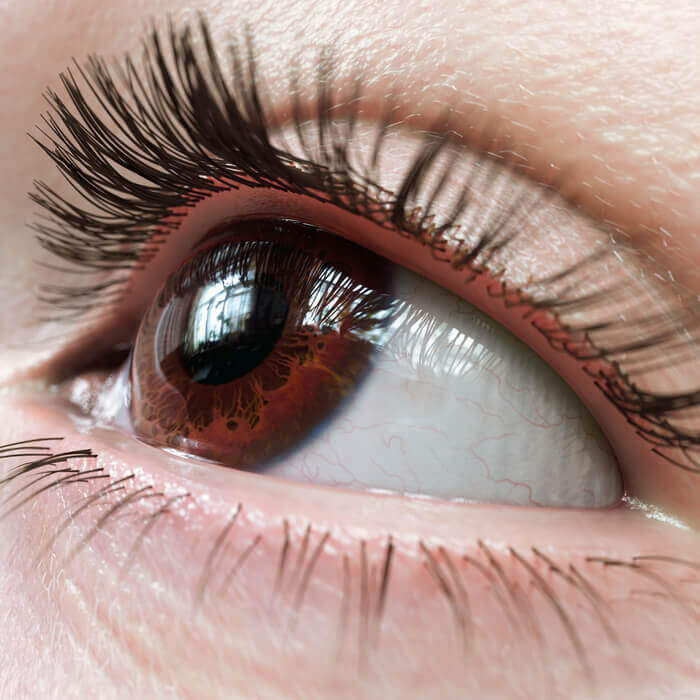
An eye with a visible light-reflecting mesh along the eyelid.
More pictures on Jēkabs’ ArtStation.
To imitate tears, I added some transparent but light-reflecting mesh all along the edge of the eyelid. It creates a smooth transition from the sharp angle of the eyelid to the smooth semicircle of the eyeball.
White part of the eye
Another thing to remember is that the white part of the eyeball is not completely smooth, although we’re used to thinking about it that way. You can’t really see it when looking at the eye directly. But when observing reflections that it makes, you can see that the surface of the white of the eye is uneven.
When applied to a 3D model of the eye, this displacement really makes a difference. The white part’s reflection will split into various different forms and create a more realistic look. If you keep the surface smooth, the eye will just resemble a lifeless glass sphere.
Eye needs multiple reflections
Anatomically, the eye is a sphere with a protrusion which contains the iris and lens. Due to this geometry, the eye’s surface has several kinds of reflections. I created a different reflection for each part of the eye – the sphere, the protrusion, and transition between the both. I also created a fourth kind of reflection for the tear layer along the eyelids.
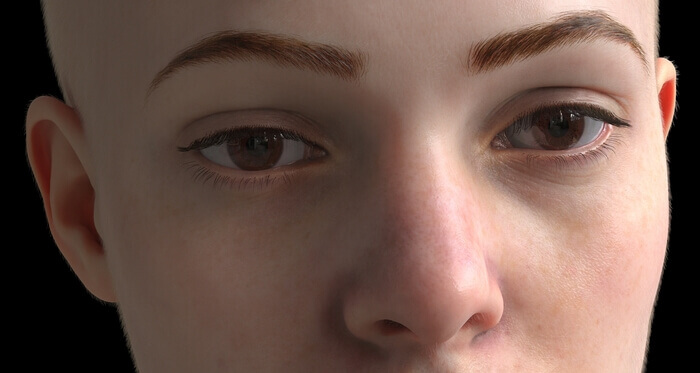
Test rendering for the eyes.
These reflections are essential because without them the eye looks dry. And if the eye is dry, the person is either very ill, dead, or made of something other than flesh and blood.
Don’t make your character cross-eyed
Another common misconception about the eyes is that the pupillary axes are parallel to each other, but it’s not true. If you make them parallel, your realistic human 3D model will look cross-eyed.
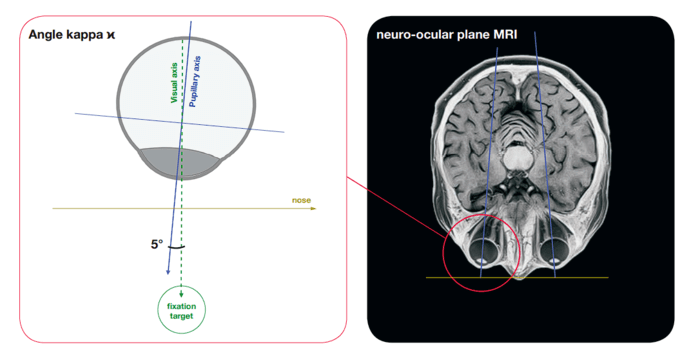
Angle kappa: the pupillary axes bow out at around 5 degrees.
When looking at an infinite distance, human eyes bow out at around 5 degrees. It’s called angle kappa. Although in real life each eye might have a slightly different angle kappa, it’s still somewhere around 5 degrees.
What about the eyelashes? Check out the next blog about hair and teeth to find out!
Join our newsletter
Be the first to receive news about upcoming books, projects, events and discounts!