Realistic human 3D model: the skin

For a realistic rendering of human skin, we need to take a closer look at the textures used for the skin shader. In this walkthrough, our senior 3D artist Jēkabs Jaunarājs shares his methods for authoring these textures.
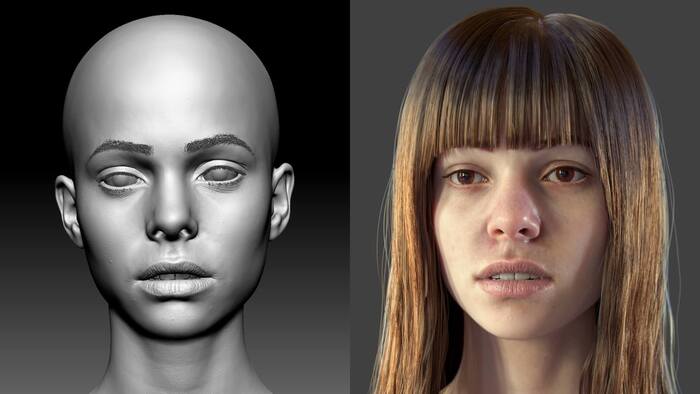
Some time ago, I created Alina, a realistic human 3D model I will reference in this article focusing on texture work and considerations for creating natural-looking skin.
This article is the third in my blog series exploring the making of Alina. The first article focused on eyes, and the second on hair and teeth.
3D model skin
A realistic skin render relies mainly on your shader, which, in turn, relies massively on textures. In this case, referencing nature (real human skin) is the best approach.
The closest approximation that a 3D artist could work with is photogrammetry scans of real people. It does, however, come with many setbacks. In a diffuse texture projected on the model from photogrammetry images, you will see a lot of problems:
- Self-shadowing and ambient occlusion;
- Reflections on glossy surfaces (i.e., eyes);
- Hair, eyebrows, and eyelashes projected on the skin;
- Projection errors (i.e., projecting a part of the ear on the neck).

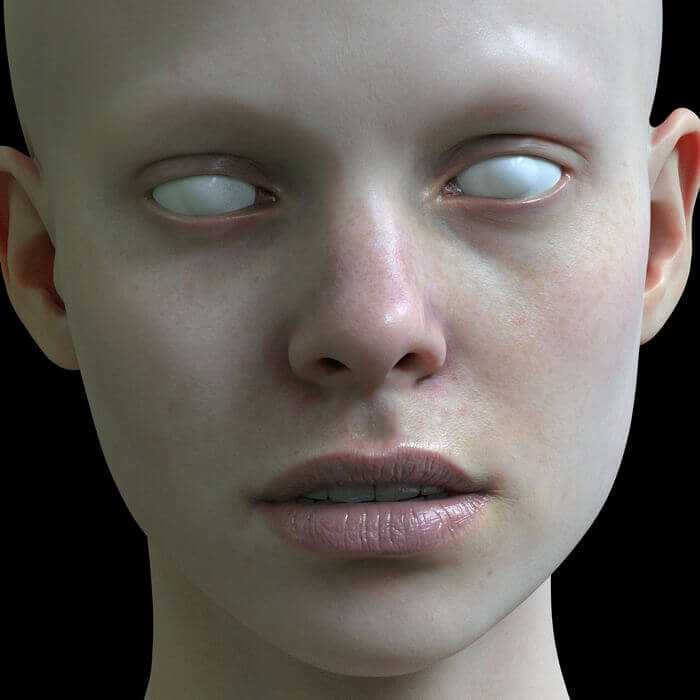
Test render for the skin.
More pictures on Jēkabs’ ArtStation.
Despite these issues, this is my starting point for texturing work because all the features here are real, and nothing is imagined or inauthentic. I follow the reference and paint the problematic areas manually to make them as they should be.
But I will return to texture authoring later because the first step is, after all, to do your UVs, and there are some important points to cover.
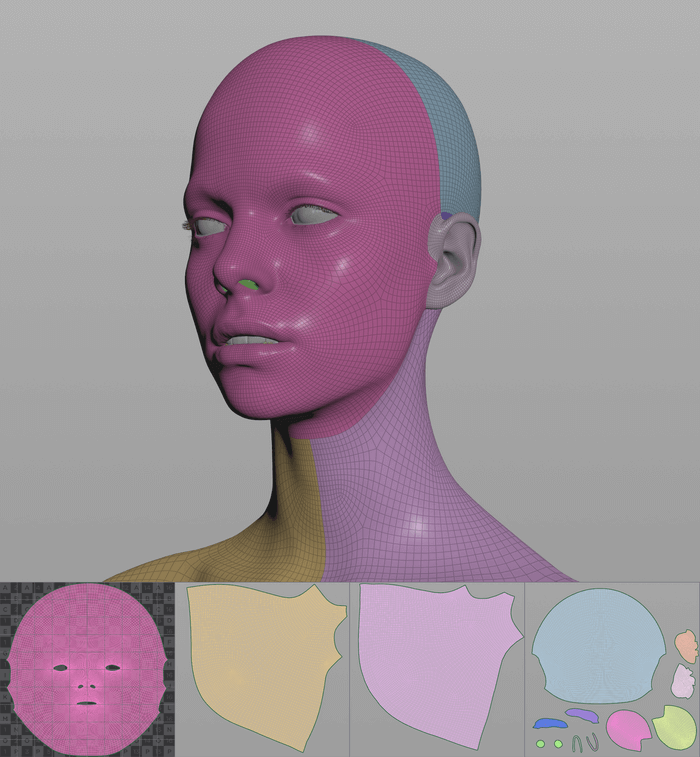
Use texel density to your advantage
Texel density indicates how many texture pixels are assigned to a unit of length on your 3D model, and it’s essential because texture size is a limited resource.
Different parts of a mesh can have varying texel density. It’s best to assign higher texel density to the parts of the mesh where it’s making a bigger impact and lower where it doesn’t make a difference.
In practice, assign more texel density to the face: nose, eyebrows, and lips, less to the neck and ears, and much less to the scalp area if it’s covered by hair. In other words, scale the important areas up and the insignificant areas down when unwrapping your mesh.
UDIMs technique
If you’d like to push your work past this texture size limitation, consider UDIMs, a more advanced technique for packing your UV islands in texture space.

UDIMs technique: several individual texture sets for a single model.
A bit of technical jargon first: “texture set” refers to the list of textures meant to work together in a shader (i.e., diffuse, normal, and roughness textures). With UDIMs, a single texture set is split into several individual sets, which is also the case for my model.
When preparing your UV space for UDIMs, the main thing to remember is that our UV space is separated into discrete units (each unit becomes its own texture set), each with its own address, just like a chess table in real life. There can not be any negative U or V coordinate values, so only put your UV islands in the upper right quadrant in the UV space.
As a technical note to more advanced users, it’s possible to have multiple UV sets and UDIMs sets for the same mesh. A single mesh can have a collection of different layouts and various texture sets for these layouts.
Displacement map

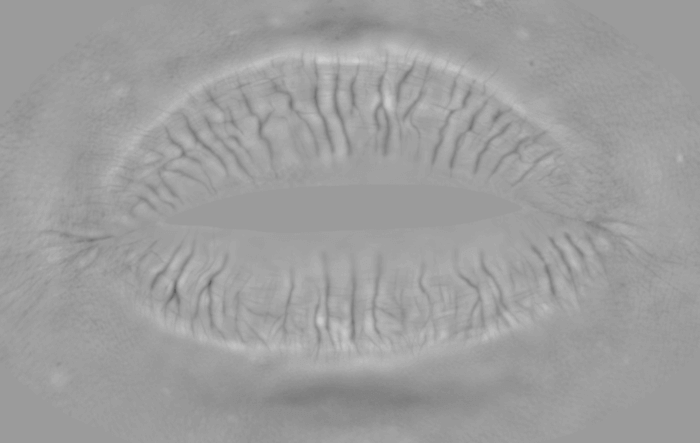
Displacement map fragment of the lips.
A displacement map is a map that modifies geometry itself. In essence, after subdivision, a displacement map moves (or displaces) the actual geometric position of the points over the mesh surface.
The mesh gets moved in the polygon normal direction by either pushing its surface out or in. This way, it’s possible to work with a simplified version in 3D software while still having all the high polycount sculpt details at rendering time.
Displacement maps are never painted. They’re baked from the highest sculpt subdivision level to the lowest. It’s also best to save them as .exr with either 16 or 32 bits because it allows for much, much more height information to be saved compared to the standard 8 bit images.
Diffuse map of the skin

The final diffuse texture spread across 4 UDIMs tiles.
A diffuse map of the skin should consider that human skin looks very different depending on the specific part of the body. I know some of these differences as a fact, and some are just my observations from references, which may not apply to every case:
- The vermilion border demarcates the thin skin of the lips from the adjacent normal skin;
- White roll is a lighter skin strip above the upper lip’s vermilion border. It gives a youthful look to the character;
- The skin is usually reddish around the nose;
- The region around the eyes has a darker look.
The diffuse map should not have any shadowing at all. It only contains surface color information, nothing else.
Skin reflections

Roughness map spread across 4 UDIMs tiles.
Human skin creates various reflections. The best way to author them is to paint both the roughness and specular maps. It can be a little confusing what the differences between these two are, so let me explain:
- The material’s roughness determines how sharp or diffuse its reflections are. Examples of low roughness are mirrors, polished metals, and glass. High-roughness materials include concrete, rubber, and textiles.
- The material’s specularity determines how reflective the surface is. Highly reflective surfaces are polished or rough metals, plastics and snow. Low-reflective surfaces are charcoal, fabrics, and wood.

Specular map spread across 4 UDIMs tiles.
For Alina, I assigned the lowest roughness for the lips and eyelids. In my black-and-white roughness texture, I colored these black, and the roughest areas stayed near white. I used all the shades of gray for the in-between areas.
Then I painted the specular map and kept adjusting it until the test renders looked right to me.
Coat or clearcoat layer

Scapular rotation happens when the arm is raised above shoulder level and the humerus locks with the acromion process.
A clearcoat layer is another little addition to realism. Naturally, the skin has a layer of oils on it, which changes the visual appearance, so add that to your model. I authored a separate texture map for this because, as with many realistic things, the effect is not uniform and varies depending on the location of the body.
Normal map
In addition to the baked normal map, it can be a great idea to use a tiling normal map to get that high-frequency detailing on your model. The downsides are, of course, the UV seams because it’s not a baked texture.
A workaround for that, which I have sometimes used, is to add a separate alpha map that will hide the tiling map on the areas where there are seams. In computer graphics, there are no strict rules. It’s all cheating anyway, so just do what you must to get the right look.
Join our newsletter
Be the first to receive news about upcoming books, projects, events and discounts!